
In this guide, we’ll explore how to format a children’s book for printing, including page count, word count, trim sizes, bleed, margins, and more.
Embarking on the journey of creating a children’s book is an exciting venture that combines creativity, storytelling, and visual artistry. However, the process of formatting a children’s book for printing can be a daunting task, especially for first-time authors and illustrators. This comprehensive guide will walk you through the essential steps and considerations to ensure your children’s book is professionally formatted and ready for the printing press.
Creating a children’s book that captivates young readers requires more than just a compelling story and beautiful illustrations. The way your book is formatted plays a crucial role in its overall appeal and readability. From choosing the right trim size to perfecting page layouts, every detail matters in the world of children’s publishing. Whether you’re crafting a picture book for toddlers or a chapter book for middle-grade readers, understanding the nuances of book formatting will help you produce a polished, professional product that stands out on bookshelves.
Let’s dive in and uncover the secrets to formatting a children’s book that will delight young readers and stand the test of time.
Understanding Children’s Book Categories
Before delving into the specifics of formatting, it’s crucial to understand the different categories of children’s books. Each category has its own set of formatting requirements and considerations.
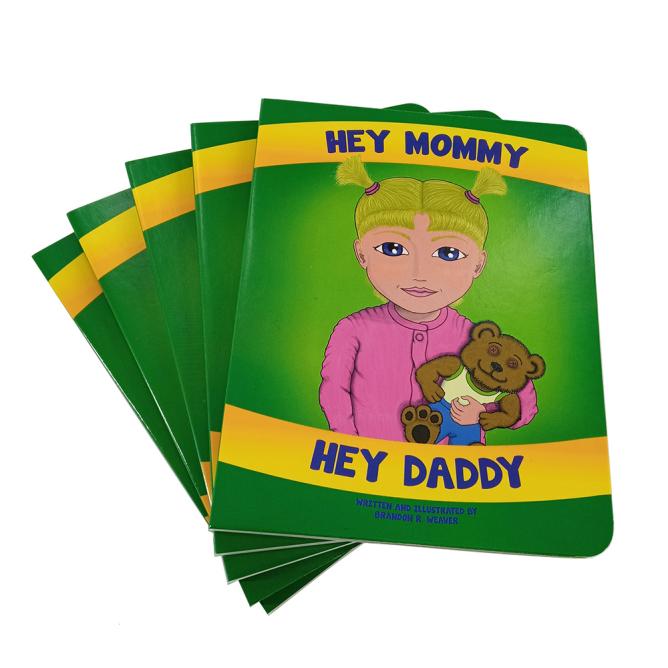
 Board Books
Board books are designed for the youngest readers, typically infants and toddlers up to age 3. These books are characterized by their sturdy construction, featuring thick cardboard pages that can withstand rough handling. When formatting a board book, consider the following:
-
Page count: Usually between 5 to 10 spreads (10-20 pages)
-
Word count: Minimal text, often just a few words per page
-
Trim size: Commonly 6 x 6 inches or 7 x 7 inches, but can vary
-
Bleed: Full bleed is standard for board books
-
Special considerations: Rounded corners for safety, non-toxic materials
 Picture Books
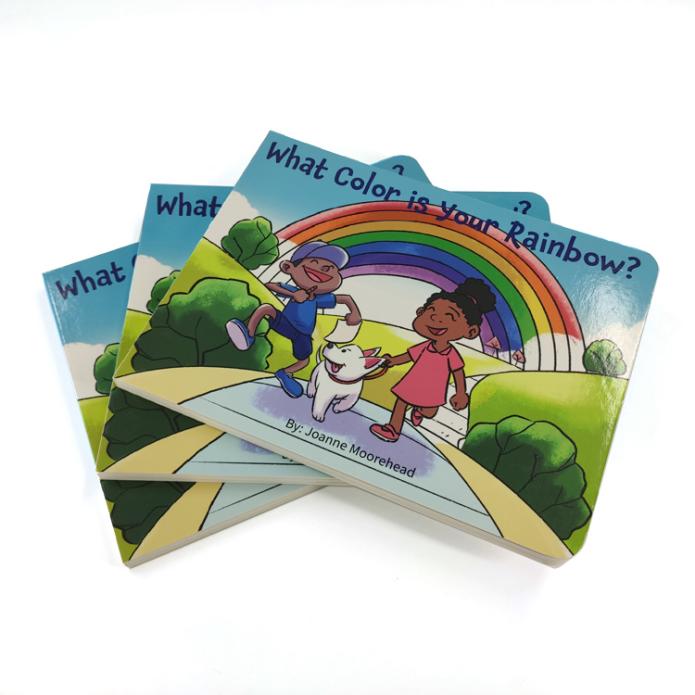
Picture books are the most common type of children’s books, typically aimed at children ages 3-8. They rely heavily on illustrations to tell the story. Key formatting considerations include:
-
Page count: Standard 32 pages, including front and back matter
-
Word count: Generally 500-1000 words
-
Trim size: Various options, but 8 x 10 inches, 9 x 9 inches and 8.5 x 11 inches are popular
-
Bleed: Full bleed is common but not mandatory
-
Text placement: Carefully integrated with illustrations
 Early Readers
Early reader books are designed for children who are just beginning to read independently. These books feature:
-
Page count: Usually 32-64 pages
-
Word count: 1000-3500 words, depending on the level
-
Trim size: Often smaller than picture books, around 6×9 inches
-
Illustrations: Present but less dominant than in picture books
-
Text: Larger font size, simple vocabulary, and short sentences
 Chapter Books
Chapter books are for more confident readers, typically ages 7-10. Formatting considerations include:
-
Page count: Usually 80-160 pages
-
Word count: 5,000-20,000 words
-
Trim size: Often 5 x 7.5 inches or 5.5 x 8.5 inches
-
Illustrations: Black and white illustrations scattered throughout
-
Text: Standard font size, more complex vocabulary and sentence structures
Understanding these categories will help you make informed decisions about your book’s format, ensuring it meets the expectations of your target audience and aligns with industry standards.
Choosing the Right Trim Size
Selecting the appropriate trim size for your children’s book is a crucial decision. It impacts not only the visual appeal of your book but also its production costs and marketability. The trim size refers to the final dimensions of your book after it has been printed and cut.
Standard Trim Sizes for Children’s Books
While there’s no one-size-fits-all approach, certain trim sizes are more common in children’s publishing:
-
Board Books: 6 x 6 inches, 7 x 7 inches
-
Picture Books: 8 x 10 inches, 8.5 x 11 inches, 9 x 9 inches
-
Early Readers: 6 x 9 inches, 5.5 x 8.5 inches
-
Chapter Books: 5 x 7.5 inches, 5.5 x 8.5 inches
Factors to Consider When Choosing Trim Size
-
Age of target audience: Younger children often prefer larger books with bigger illustrations.
-
Type of book: Picture books typically require larger trim sizes than chapter books.
-
Illustration style: Detailed illustrations may benefit from a larger format.
-
Production costs: Larger books generally cost more to print.
-
Shelf appeal: Consider how your book will look alongside others in its category.
-
Reading experience: Ensure the size is comfortable for children to hold and read.
Landscape vs. Portrait Orientation
While most children’s books use a portrait orientation, some picture books opt for a landscape format. Consider the following:
-
Landscape orientation can be visually striking and allow for panoramic illustrations.
-
Portrait orientation is more traditional and may be easier for young children to handle.
 |
 |
| Portrait Book | Landscape Book |
Custom Trim Sizes
While standard sizes are popular, don’t be afraid to consider custom trim sizes if they better suit your book’s concept. However, keep in mind:
-
Custom sizes may increase production costs.
-
Unusual sizes might not fit well on standard bookshelves.
-
Some retailers have size restrictions for books they stock.
By carefully considering your trim size options, you can ensure your children’s book not only looks great but also provides an optimal reading experience for your young audience.
Understanding Bleed and Margins
Bleed and margins are critical elements in book design that ensure your children’s book looks professional and prints correctly. Understanding these concepts is essential for creating a polished final product.
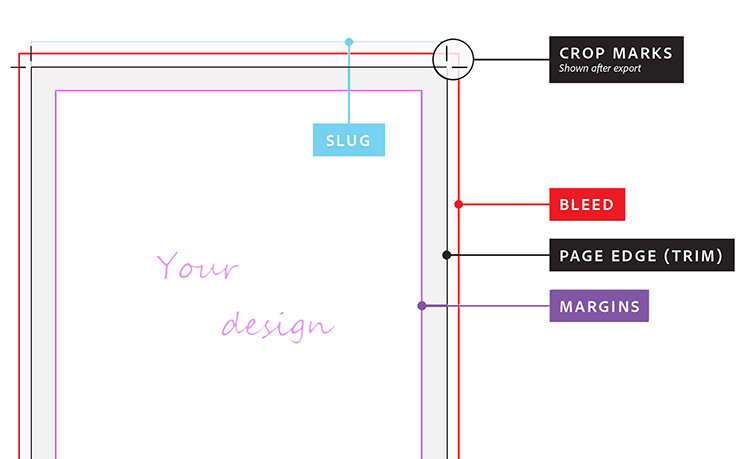 What is Bleed?
Bleed refers to the area of artwork or background color that extends beyond the final trim size of your book. It’s used to prevent white edges from appearing when the book is cut to its final size. Key points about bleed:
-
Standard bleed is 0.125 inches (3mm) on all sides.
-
Bleed is crucial for full-page illustrations or backgrounds that extend to the edge of the page.
-
Not all children’s books require bleed, but it’s common in picture books.
Setting Up Bleed in Your Document
To set up bleed correctly:
-
Increase your document size by 0.25 inches in both width and height.
-
Create guides 0.125 inches from each edge to mark the trim line.
-
Extend background colors and illustrations to the outer edge of the bleed area.
Understanding Margins
Margins are the blank spaces around the edges of your page. They serve several purposes:
-
Prevent text and important elements from being cut off during trimming.
-
Provide space for the book’s binding without obscuring content.
-
Improve readability by giving the text room to “breathe” on the page.
Recommended Margin Sizes
While margin sizes can vary, here are some general guidelines:
-
Outside margin: At least 0.5 inches
-
Top margin: At least 0.5 inches
-
Bottom margin: At least 0.5 inches
-
Inside margin (gutter): Depend on the page count, for the children’s picture book with low page counts, the gutters are often 0.375″.
The Importance of the Gutter
The gutter, or inside margin, requires special attention: it needs to be wider than other margins to account for the book’s binding. Consider a slightly larger gutter for books intended for younger children, as they may open the book more forcefully.
Safety Zone
Within your margins, it’s wise to establish a safety zone:
-
Keep all essential text and image elements within this zone.
-
Generally, set the safety zone 0.25 inches inside your margins.
-
This extra precaution ensures no crucial elements are lost during trimming.
By properly implementing bleed and margins in your children’s book design, you’ll create a professional-looking product that prints beautifully and is easy for children to read and enjoy.
Working with Illustrations
Illustrations are the heart of many children’s books, particularly picture books. Properly integrating these visual elements with your text is crucial for creating an engaging and cohesive reading experience.
Illustration Formats and Resolution
When working with illustrations, consider the following:
-
File format: Use high-quality formats like PDF for print.
-
Resolution: Aim for 300 DPI (dots per inch) for crisp, clear printing.
-
Color mode: Use CMYK color mode for print publications, not RGB.
Placing Illustrations in Your Layout
When incorporating illustrations into your book layout:
-
Import images at their full resolution to maintain quality.
-
Avoid scaling images up, as this can result in pixelation.
-
Ensure illustrations extend into the bleed area if they’re meant to reach the page edge.
-
Use guides and grids to align illustrations consistently across pages.
Balancing Text and Illustrations
Creating harmony between text and images is crucial:
-
Leave ample white space around text for readability.
-
Consider the flow of the story when placing illustrations.
-
Ensure text doesn’t obscure important parts of the illustrations.
-
Use text wrapping tools to integrate text smoothly with images.
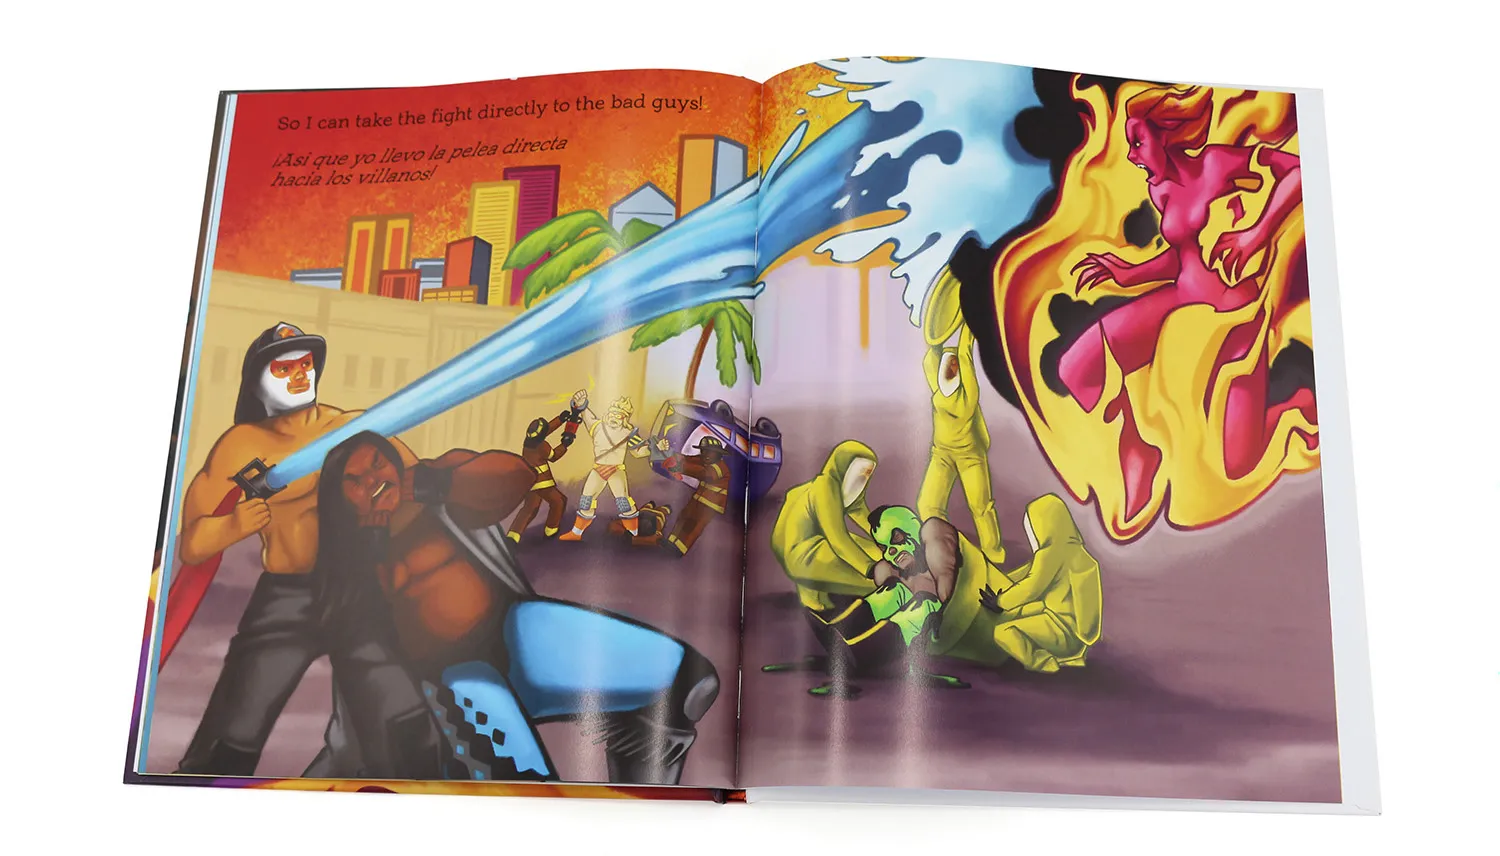
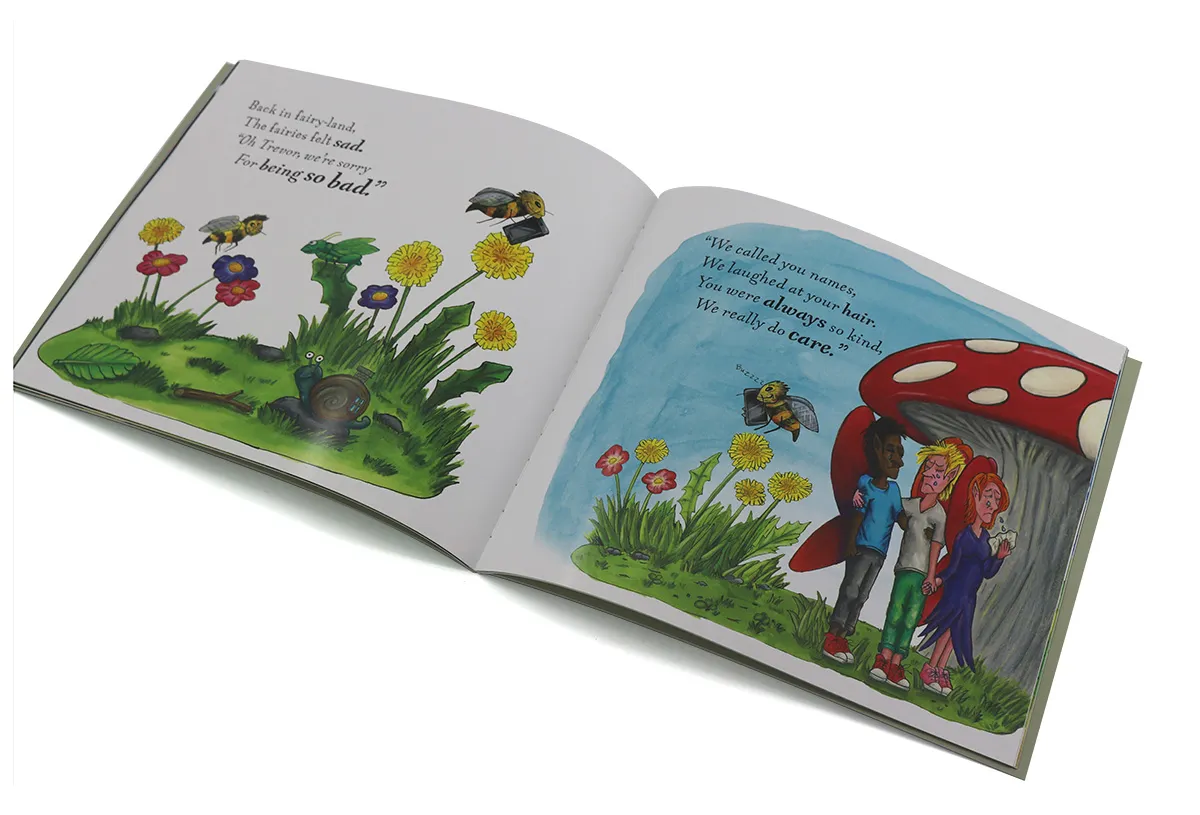
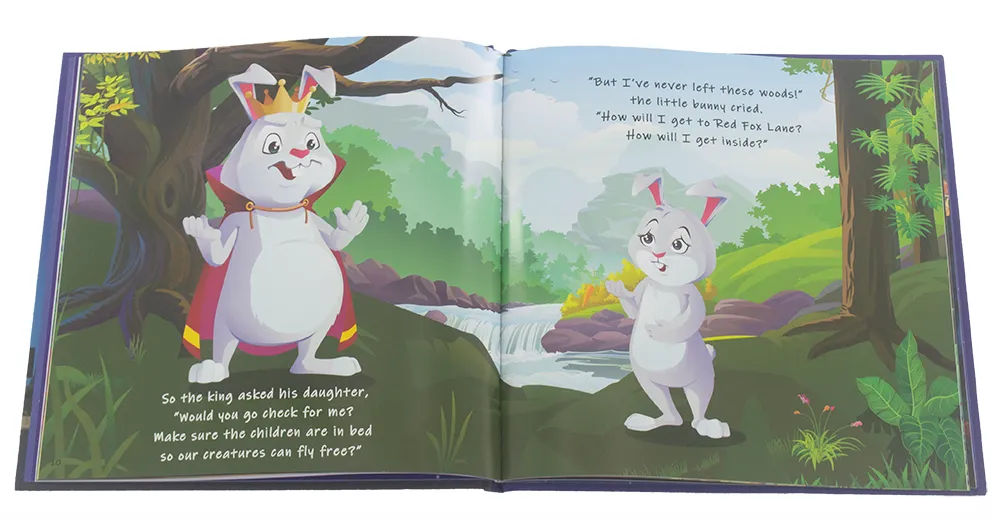
Double-Page Spreads
Many children’s books feature double-page spreads:
-
Account for the gutter when designing spreads to avoid losing crucial elements in the binding.
-
Consider creating a single image file for the entire spread to ensure perfect alignment.
-
Be mindful of how the spread will look when the book is opened flat.
Consistency in Style
Maintain visual consistency throughout your book. Use a consistent style and color palette across all illustrations. Ensure characters look the same from page to page. Consider creating style guides for illustrators to follow.
Working with Illustrators
If you’re collaborating with an illustrator:
-
Provide clear briefs detailing what each illustration should depict.
-
Discuss technical requirements like file format, resolution, and color mode.
-
Allow for revisions and feedback to ensure the illustrations match your vision.
Testing Your Layout
Before finalizing your design:
-
Print test pages to check how illustrations look on paper.
-
View your layout on different devices to ensure digital versions look good.
-
Get feedback from others, especially your target age group if possible.
Choosing the Right Font
Selecting appropriate fonts for your children’s book is crucial for readability and overall design aesthetics. The right font choices can enhance the reading experience and complement your illustrations.
Readability for Young Readers
When choosing fonts for children’s books, prioritize readability:
-
Opt for clear, simple fonts without excessive decorative elements.
-
Choose fonts with distinct letter shapes, especially for early readers.
-
Avoid fonts that could be confusing for children learning to read (e.g., a lowercase ‘l’ that looks like an uppercase ‘I’).
Font Size Considerations
Font size is critical for young readers:
-
For picture books: 14-18 point size is common.
-
For early readers: 16-18 point size is often used.
-
For chapter books: 12-14 point size is typical.
-
Consider your target age group when deciding on font size.
Serif vs. Sans-Serif Fonts
Both serif and sans-serif fonts can work well in children’s books:
-
Serif fonts: Can add character and are often used in longer text passages.
-
Sans-serif fonts: Clean and modern, often preferred for younger readers.
-
Consider using a combination, such as a sans-serif font for headings and a serif font for body text.
 |
 |
| Serif Fonts | Sans-serif Fonts |
Popular Font Choices for Children’s Books
Some fonts that work well in children’s books include:
-
Sassoon Primary
-
Gill Sans Infant
-
Bembo Infant
-
Futura
-
Helvetica Neue
-
Garamond
Decorative Fonts
While decorative fonts can be tempting, use them sparingly:
-
Limit decorative fonts to titles or short phrases.
-
Ensure they remain readable even when scaled down.
-
Make sure they complement rather than compete with illustrations.
Font Pairing
If using multiple fonts, ensure they complement each other:
-
Limit yourself to 2-3 fonts maximum to avoid a cluttered look.
-
Choose fonts with similar x-heights for visual harmony.
-
Consider using different weights of the same font family for variety.
Testing Your Font Choices
Before finalizing your font selections: test readability with your target age group if possible and check how the fonts look alongside your illustrations.
Licensing Considerations
When choosing fonts, be aware of licensing requirements:
-
Ensure you have the right to use the font commercially.
-
Consider purchasing professional fonts for a more unique look.
-
Be cautious with free fonts, as some may have limited usage rights.
By carefully selecting and implementing appropriate fonts, you’ll enhance the readability and visual appeal of your children’s book, creating an engaging reading experience for your young audience.
Page Layout and Design
Creating an effective page layout is crucial for engaging young readers and ensuring your children’s book is visually appealing and easy to follow. A well-designed layout enhances the storytelling and keeps children interested from cover to cover.
Basic Principles of Children’s Book Layout
When designing your page layout, consider these fundamental principles:
-
Consistency: Maintain a consistent layout throughout the book.
-
Simplicity: Avoid cluttered designs that could overwhelm young readers.
-
White space: Use ample white space to improve readability and focus attention.
-
Flow: Ensure the layout guides the reader’s eye naturally through the page.
Text Placement
Carefully consider where to place text on each page:
-
Avoid placing text over busy parts of illustrations.
-
Use text boxes or shapes to create clear areas for text if necessary.
-
Align text consistently from page to page.
-
Consider the natural reading direction (left to right in English).
Creating a Grid System
A grid system can help maintain consistency and balance:
-
Divide your page into columns and rows.
-
Use the grid to align text and illustrations consistently.
-
Consider a flexible grid that allows for variety while maintaining order.
Double-Page Spreads
Many children’s books utilize double-page spreads effectively:
-
Design spreads as a cohesive unit, considering how they look when the book is open.
-
Be mindful of the gutter (center fold) when placing important elements.
-
Use spreads for dramatic moments or showcase large illustrations.
Balancing Text and Images
Striking the right balance between text and images is crucial:
-
Consider the age of your target audience when deciding text-to-image ratio.
-
For younger readers, use more images and less text.
-
As the target age increases, gradually increase the amount of text.
Using Color Effectively
Color plays a significant role in children’s book design:
-
Choose a color palette that complements your illustrations.
-
Use color consistently throughout the book.
-
Consider using color to highlight important elements or create mood.
Typography in Layout
Typography goes beyond just choosing fonts:
-
Experiment with text size and weight for emphasis.
-
Use different fonts or styles for different types of text (e.g., narration vs. dialogue).
-
Ensure proper line spacing (leading) for easy reading.
Creating Visual Hierarchy
Guide the reader’s eye through each page with visual hierarchy:
-
Use size, color, and placement to indicate the importance of elements.
-
Ensure the most important information stands out.
-
Create a clear reading order on each page.
Designing for Different Book Types
Adapt your layout based on the type of children’s book:
-
Picture books: Focus on large illustrations with minimal text.
-
Early readers: Use larger text and more white space.
-
Chapter books: Include chapter headings and more structured text layouts.
Testing Your Layout
Before finalizing your design:
-
Print test pages to see how the layout looks on paper.
-
Get feedback from your target age group if possible.
-
Check how the layout works with the physical act of turning pages.
By applying these principles of page layout and design, you’ll create a children’s book that is not only visually appealing but also enhances the reading experience for your young audience.
Preparing Your File for Printing
Once you’ve completed the design and layout of your children’s book, the next crucial step is preparing your file for printing. Proper file preparation ensures that your book prints exactly as you envision it, with crisp images and accurate colors.
Choosing the Right File Format
Select the appropriate file format for your printer:
-
PDF is the most common and preferred format for book printing.
-
Ensure you’re using PDF/X-1a:2001 or PDF/X-4:2010 standards for print-ready files.
-
Most printers also accept native files from programs like InDesign or Illustrator.
Color Management
Proper color management is crucial for accurate printing:
-
Use CMYK color mode for all elements, including images and text.
-
Convert any RGB images to CMYK before finalizing your file.
-
Consider using Pantone colors for specific branding needs, but discuss this with your printer first.
Image Resolution
Ensure all images are high-resolution:
-
Maintain a minimum of 300 DPI for all images and illustrations.
-
Check the effective resolution of placed images, especially if they’ve been scaled.
-
Avoid using images downloaded from the internet, as they’re often low resolution.
Fonts
Properly handle fonts to avoid printing issues:
-
Embed all fonts in your PDF file.
-
Alternatively, outline fonts to convert them to vector shapes.
-
If using uncommon fonts, check with your printer to ensure compatibility.
Bleed and Trim Marks
Include necessary printer’s marks:
-
Add bleed of 0.125 inches (3mm) on all sides.
-
Include trim marks to indicate where the page should be cut.
-
Add crop marks if required by your printer.
Spine Width
Calculate the correct book spine width:
-
Consult with your printer for spine width based on page count and paper thickness.
-
Ensure your cover design accounts for the correct spine width.
Proofing
Before sending your file to the printer:
-
Generate a print-ready PDF and review it carefully.
-
Use preflight tools in programs like Adobe Acrobat to check for common issues.
-
Print a hard copy proof to check colors, layout, and overall appearance.
File Organization
Keep your files organized:
-
Use clear, descriptive file names.
-
Separate interior pages and cover files.
-
Include any special instructions in a separate document.
Communicating with Your Printer
Maintain clear communication with your printer:
-
Provide detailed specifications, including trim size, paper type, page count, and binding method.
-
Discuss any special finishes or treatments (e.g., spot UV, foil stamping).
-
Ask about their preferred file delivery method.
Backup Your Files
Always maintain backups of your print-ready files. Keep multiple copies in different locations and save versions of your working files in case revisions are needed.
By meticulously preparing your files for printing, you’ll minimize the risk of errors and ensure that your children’s book is produced to the highest quality standards, ready to captivate young readers with its visual appeal and storytelling.
Choosing the Right Printing Method
Selecting the appropriate printing method for your children’s book is a crucial decision. It affects both the quality of the final product and your budget. Understanding the different printing options available will help you make an informed choice that best suits your project.
Offset Printing
Offset printing is a traditional method known for its high quality:
-
Ideal for large print runs (typically 1,000 copies or more).
-
Offers the highest print quality with sharp images and accurate colors.
-
Allows for a wide range of paper options and special finishes.
-
More cost-effective per unit for large quantities.
-
Requires a significant upfront investment.
Digital Printing
Digital printing has become increasingly popular for smaller print runs:
-
Suitable for print-on-demand and small quantities (under 1,000 copies).
-
Offers quick turnaround times.
-
Allows for easy updates and revisions between print runs.
-
Quality has improved significantly, though may not match offset for color accuracy.
-
More cost-effective for small quantities.
Print-on-Demand (POD)
Print-on-demand is a specific type of digital printing:
-
Allows you to print books as they are ordered.
-
Eliminates the need for inventory storage.
-
Ideal for self-publishers or those testing the market.
-
Quality can vary depending on the POD service used.
-
Per-unit cost is typically higher than other methods.
Considerations When Choosing a Printing Method
When deciding on a printing method, consider the following factors:
-
Print run size: How many copies do you need initially?
-
Budget: What’s your upfront budget vs. long-term cost per book?
-
Quality requirements: How important is color accuracy and image sharpness?
-
Time constraints: How quickly do you need the books?
-
Storage capabilities: Do you have space to store inventory?
-
Future reprints: How likely are you to need revisions or additional copies?
Hybrid Approaches
Some publishers opt for a hybrid approach:
-
Use offset printing for large run.
-
With digital printing or POD for test print or initial small run.
Special Considerations for Children’s Books
Children’s books often have unique printing needs:
-
Board books require specialized printing and binding.
-
Picture books may benefit from high-quality offset printing for vibrant colors.
-
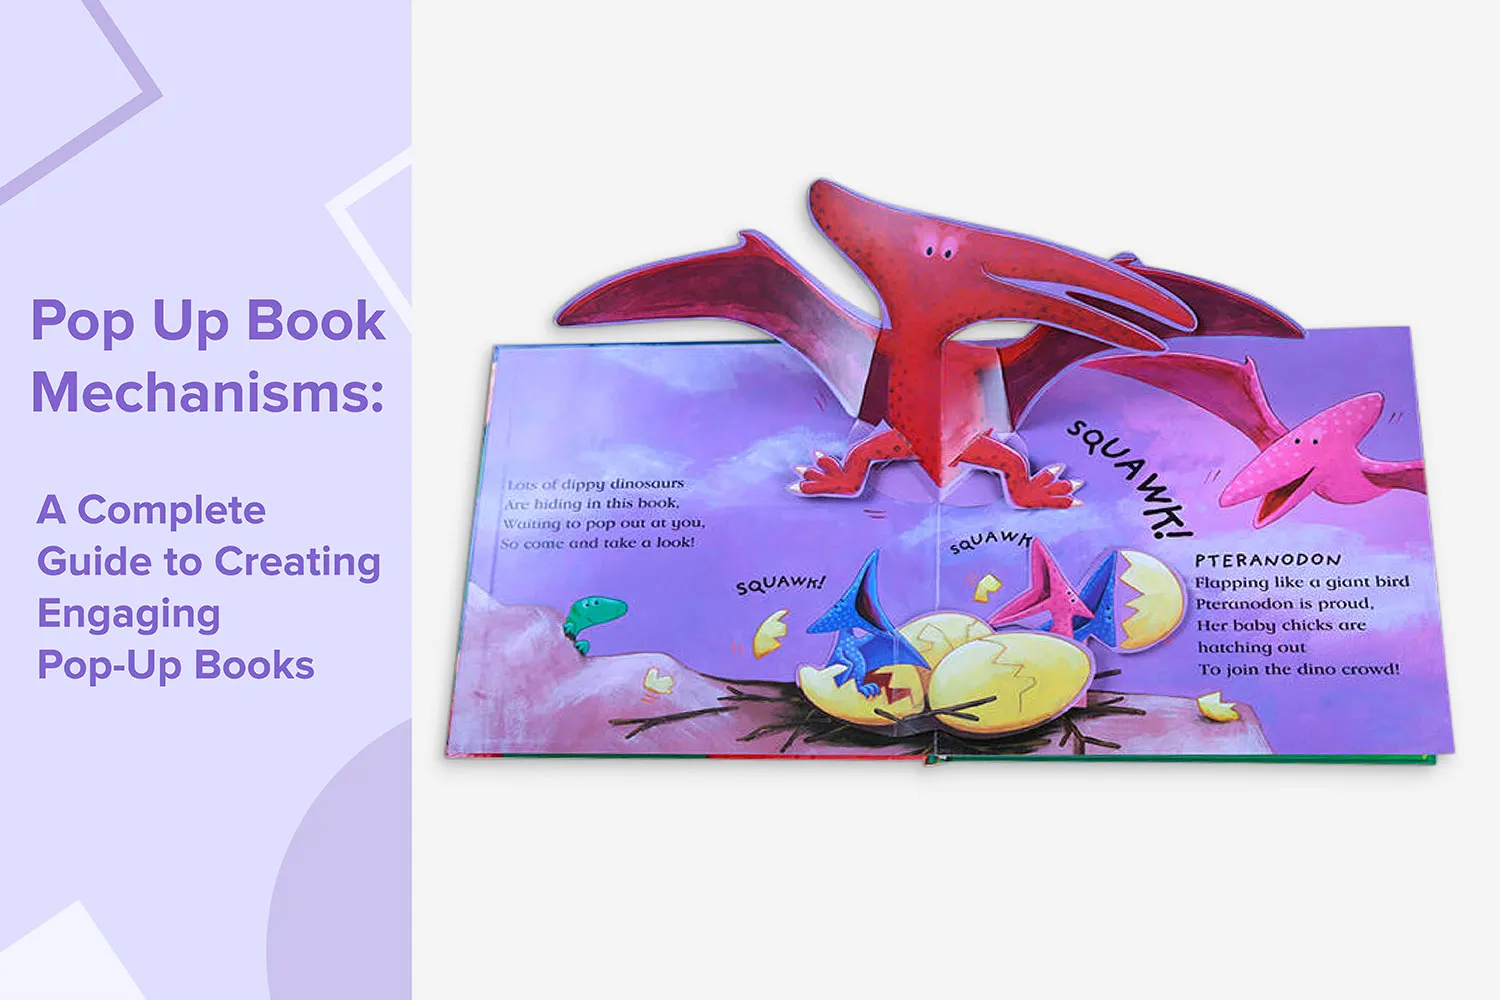
Books with special features (pop-ups, sound) may require specialized craft.
Choosing a Printer
When selecting a printer:
-
Request samples to assess print quality.
-
Ask about their experience with children’s books.
-
Inquire about paper options, binding methods and special finishes.
-
Discuss proofing processes and quality control measures.
Environmental Considerations
Consider the environmental impact of your printing choice:
-
Look for printers using sustainable practices.
-
Inquire about eco-friendly paper options.
-
Consider the carbon footprint of shipping and storage for large print runs.
By carefully evaluating these factors and understanding the pros and cons of each printing method, you can choose the option that best aligns with your children’s book printing project, ensuring a high-quality product that meets your budget and production needs.
Proofreading and Quality Control
Before sending your children’s book to print, thorough proofreading and quality control are essential steps to ensure a polished, professional final product. These processes help catch any errors or inconsistencies that might have been overlooked during the creation process.
The Importance of Proofreading
Proofreading is crucial for several reasons:
-
It catches spelling, grammar, and punctuation errors.
-
It ensures consistency in style and formatting.
-
It helps maintain the credibility of your book and you as an author.
-
It prevents costly reprints due to errors.
Multiple Rounds of Proofreading
Implement several rounds of proofreading:
-
Self-proofread: Review your work multiple times.
-
Peer review: Have colleagues or fellow writers review your book.
-
Professional proofreading: Consider hiring a professional proofreader.
-
Beta readers: Get feedback from your target audience or their parents.
What to Look for When Proofreading
During the proofreading process, pay attention to:
-
Spelling and grammar errors
-
Consistency in character names and descriptions
-
Logical flow of the story
-
Appropriate vocabulary for the target age group
-
Correct page numbers and chapter headings
-
Consistency in font usage and formatting
Proofreading Techniques
Employ various techniques to catch different types of errors:
-
Read aloud to catch awkward phrasing and rhythm issues.
-
Read backwards to focus on individual words rather than content.
-
Use digital tools like spell-checkers and grammar-checking software.
-
Print a hard copy to proofread, as errors are often easier to spot on paper.
Quality Control for Illustrations
Don’t forget to review the visual elements:
-
Check for consistency in character appearance across pages.
-
Ensure illustrations match the text descriptions.
-
Look for any unintended elements in the background of illustrations.
-
Verify that colors are consistent and appropriate throughout the book.
Layout and Formatting Quality Control
Review the overall layout and formatting:
-
Check that text and illustrations are properly aligned.
-
Ensure consistent margins and spacing throughout the book.
-
Verify that page numbers are correct and in the right position.
-
Check that headers and footers are consistent and correct.
Creating a Style Guide
Develop a style guide for your book to maintain consistency:
-
List preferred spellings of character names and places.
-
Note any specific formatting choices (e.g., how numbers are written).
-
Include guidelines for illustration style and color palette.
Final Check Before Printing
Before sending your file to the printer:
-
Review a digital proof of the entire book.
-
If possible, order a physical proof to check colors and layout.
-
Have someone unfamiliar with the book give it a final read-through.
By implementing a thorough proofreading process, you ensure that your children’s book meets the highest standards of professionalism. This attention to detail will result in a polished product that you can be proud of and that will resonate with your young readers and their parents.
Marketing and Distribution Considerations
While formatting and printing your children’s book are crucial steps, considering marketing and distribution strategies early in the process can significantly impact your book’s success. Here are some key aspects to keep in mind as you prepare your children’s book for the market.

ISBN and Barcode
Obtain necessary identifiers for your book:
-
Get an ISBN (International Standard Book Number) for each format of your book.
-
Include a barcode on the back cover for retail sales.
-
Consider registering your copyright for legal protection.
Book Metadata
Prepare comprehensive metadata for your book:
-
Write a compelling book description.
-
Choose appropriate categories and keywords.
-
Include author bio and any relevant awards or recognitions.
Cover Design for Marketing
Ensure your cover is designed with marketing in mind:
-
Create an eye-catching design that stands out on shelves and in thumbnails.
-
Include positive reviews or endorsements if available.
-
Consider how the cover looks when scaled down for online listings.
Creating Marketing Materials
Develop supporting materials for promotion:
-
Design bookmarks or postcards featuring your book.
-
Create a press kit with author information and book details.
-
Prepare high-quality digital images of your book cover and sample pages.
Online Presence
Establish an online presence for your book:
-
Create an author website or landing page for your book.
-
Set up social media accounts to engage with readers and promote your book.
-
Consider starting a blog related to children’s literature or your book’s theme.
Distribution Channels
Explore various distribution options:
-
Research print-on-demand services like Amazon KDP or IngramSpark.
-
Consider working with a distributor to reach bookstores and libraries.
-
Explore e-book distribution platforms for digital versions of your book.
Local and Niche Marketing
Target specific markets for your children’s book:
-
Reach out to local bookstores for potential book signings or readings.
-
Contact schools and libraries for possible author visits.
-
Identify niche markets related to your book’s theme (e.g., educational suppliers for educational books).
Book Reviews
Seek reviews to build credibility:
-
Submit your book to children’s book review websites and blogs.
-
Reach out to parenting magazines or blogs for potential reviews.
-
Encourage readers to leave reviews on platforms like Amazon and Goodreads.
Pricing Strategy
Develop a pricing strategy for your book:
-
Research pricing of similar children’s books in your genre.
-
Consider production costs and desired profit margin.
-
Plan for promotional pricing or bulk discounts for schools and libraries.
Launch Planning
Plan a strategic book launch:
-
Set a launch date and create a timeline for pre-launch activities.
-
Consider a pre-order campaign to build anticipation.
-
Plan a launch event, either in-person or virtual.
Ongoing Promotion
Develop a long-term promotion strategy:
-
Plan regular social media posts and engagement.
-
Create a newsletter to keep in touch with readers and supporters.
-
Consider seasonal promotions (e.g., back-to-school, holidays).
Tracking and Analytics
Set up systems to track your book’s performance:
-
Monitor sales across different platforms.
-
Track website traffic and engagement on social media.
-
Use this data to refine your marketing strategies over time.
By considering these marketing and distribution aspects alongside your formatting and printing decisions, you’ll be well-prepared to launch your children’s book successfully. Remember, marketing is an ongoing process, and continual effort in promoting your book will help it reach and resonate with your intended audience.
Conclusion
Formatting a children’s book for printing is a multifaceted process that requires attention to detail, creativity, and technical knowledge. From understanding the nuances of different children’s book categories to mastering the intricacies of layout design and illustration placement, each step plays a crucial role in creating a captivating and professional-quality book.
Remember, the journey doesn’t end with printing. Marketing and distribution are equally important aspects of bringing your children’s book to life and into the hands of young readers. By considering these elements early in the process, you set yourself up for greater success in the competitive world of children’s publishing.
Whether you’re a first-time author or a seasoned professional, the process of formatting and publishing a children’s book is a rewarding experience. It’s an opportunity to contribute to the rich tapestry of children’s literature and potentially make a lasting impact on young readers.
Ready to print your own children’s book? Contact us to get an instant quote today! Whether you want to print board books for toddlers, chapter books for older children, or any type of children’s book, we can turn your dreams into reality with quality printing that will impress your target audience.